No edit summary Tag: Visual edit |
No edit summary Tag: Visual edit |
||
| Line 1: | Line 1: | ||
| − | {{Stub}} |
||
| − | |||
{{creature infobox |
{{creature infobox |
||
| name = Glyphid Grunt |
| name = Glyphid Grunt |
||
| Line 16: | Line 14: | ||
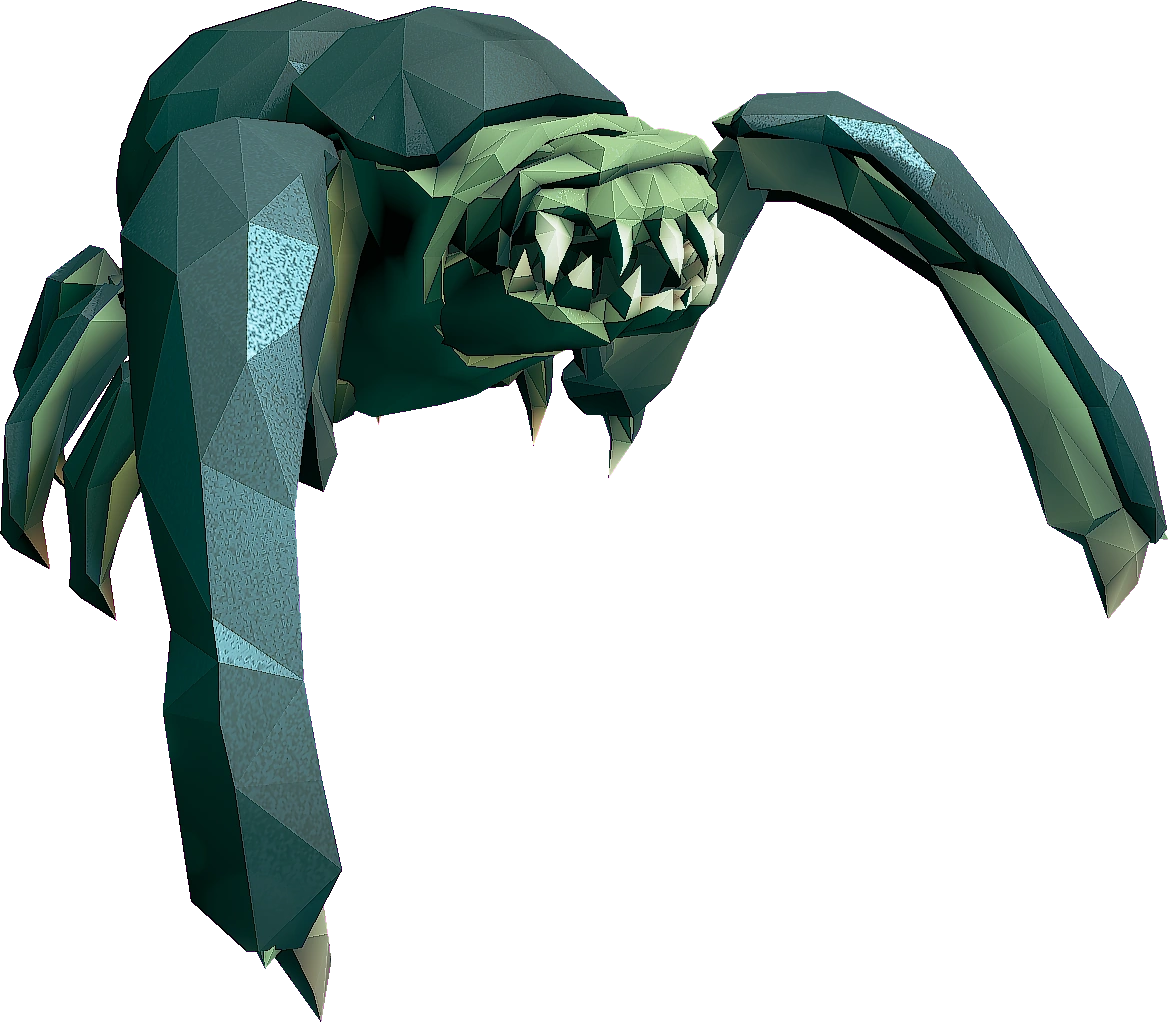
The '''Glyphid Grunt''' is a hostile [[Creatures|creature]] found on [[Hoxxes]]. It is the most common member of the [[Glyphid]] species, and is found in every [[Biome|region]] of the planet. Individually they are quite weak, so they are often seen travelling and hunting in packs. It has no visible eyes, and likely gets around via echolocation (it can often be seen screeching into the darkness) or by scent, such as when targeting [[Dwarves]]. |
The '''Glyphid Grunt''' is a hostile [[Creatures|creature]] found on [[Hoxxes]]. It is the most common member of the [[Glyphid]] species, and is found in every [[Biome|region]] of the planet. Individually they are quite weak, so they are often seen travelling and hunting in packs. It has no visible eyes, and likely gets around via echolocation (it can often be seen screeching into the darkness) or by scent, such as when targeting [[Dwarves]]. |
||
| + | Grunts are by far the most common enemy type in the entire game, and are plentiful in their numbers. They will sometimes be seen idly wandering the caves of Hoxxes in groups, but theyre most commonly seen burying up from the terrain to engage the Dwarves. Their attacks are purely melee based, and require them to close into point-blank range. They attack by either biting to swiping their large front legs - both attacks deal the same amount of damage. |
||
| − | As an arachnid it has eight legs; six of which are smaller for movement and two larger front legs allowing it to dig into or out of the ground or attacking. It can also attack with its large mouth. |
||
| − | + | Much of the Grunt's body is covered in Light Armor, which is coloured a darker brown to the Grunt's light skin tone. It can protect the Grunt from some damage if targeted by weapons fire, though it can be broken. Armor Breaking modifications made to weapons will pierce straight through armour, allowing the maximum amount of damage to be dealt anywhere on the Grunt's body. The mouth and underbelly are unarmored, and will cause the Grunt to recieve double damage if targeted with weapons fire. Weakspot Bonus modifications can further increase the damage dealt to weak spots. |
|
| + | Given that they are the game's most common enemy, the Grunt is not an exceptional foe and is easily killed by the majority of weapons in the game. Their true power lies in numbers, where the sheer amount of Grunts charging towards a team is their best odds of closing into range. While this strategy is effective, it makes them vulnerable to crowd control weapons such as the [[CRSPR Flamethrower]] due to how they like to group up when engaging a Dwarf. Their Light Armor only protects them from so much damage, and their lack of ranged capability makes them easy to space out. They are also highly vulnerable to Stuns and status effects such as Poison, Electrocution and Fear. |
||
| ⚫ | |||
| + | This creature also has [[Glacial Strata]] and [[Radioactive Exclusion Zone]] variants. The Glacial Strata variant is resistant to Ice damage and freezing, but takes extra damage from Fire. The Radioactive Exclusion Zone variant resists half of all Radiation damage. Alongside this there are two alternative forms of the Grunt - the [[Glyphid Grunt Slasher]] and the [[Glyphid Grunt Guard]], which have their own behaviours and statistics. |
||
| − | This creature also has [[Glacial Strata]] and [[Radioactive Exclusion Zone]] variants. |
||
== Stats == |
== Stats == |
||
The creature's damage resistance changes depending on the Hazard Level. Player count doesn't affect the resistance. |
The creature's damage resistance changes depending on the Hazard Level. Player count doesn't affect the resistance. |
||
| Line 47: | Line 45: | ||
'''Weakpoint:''' |
'''Weakpoint:''' |
||
* Mouth (200%) |
* Mouth (200%) |
||
| + | |||
| + | == Tips == |
||
| + | |||
| ⚫ | |||
| + | * As mentioned before, the [[CRSPR Flamethrower]] is excellent for clearing swarms of Grunts at once. Its unlimited piercing and Sticky Flames excel at controlling hordes. |
||
| + | * The [["Thunderhead" Heavy Autocannon|Heavy Autocannon]]'s explosive bullets can saturate a battlefield and damage many Grunts at once. |
||
| + | * The [[Deepcore GK2]] can quickly gun down a Grunt, and if carefully controlled, it can kill many Grunts in a single mag when firing for weakspots. |
||
| + | * The [[Deepcore 40mm PGL|40mm PGL]] has a large blast radius, and can be used to clear out tightly clustered groups of Glyphids with a single shell. |
||
== Gallery == |
== Gallery == |
||
Revision as of 21:41, 29 May 2020
Template:Creature infobox
The Glyphid Grunt is a hostile creature found on Hoxxes. It is the most common member of the Glyphid species, and is found in every region of the planet. Individually they are quite weak, so they are often seen travelling and hunting in packs. It has no visible eyes, and likely gets around via echolocation (it can often be seen screeching into the darkness) or by scent, such as when targeting Dwarves.
Grunts are by far the most common enemy type in the entire game, and are plentiful in their numbers. They will sometimes be seen idly wandering the caves of Hoxxes in groups, but theyre most commonly seen burying up from the terrain to engage the Dwarves. Their attacks are purely melee based, and require them to close into point-blank range. They attack by either biting to swiping their large front legs - both attacks deal the same amount of damage.
Much of the Grunt's body is covered in Light Armor, which is coloured a darker brown to the Grunt's light skin tone. It can protect the Grunt from some damage if targeted by weapons fire, though it can be broken. Armor Breaking modifications made to weapons will pierce straight through armour, allowing the maximum amount of damage to be dealt anywhere on the Grunt's body. The mouth and underbelly are unarmored, and will cause the Grunt to recieve double damage if targeted with weapons fire. Weakspot Bonus modifications can further increase the damage dealt to weak spots.
Given that they are the game's most common enemy, the Grunt is not an exceptional foe and is easily killed by the majority of weapons in the game. Their true power lies in numbers, where the sheer amount of Grunts charging towards a team is their best odds of closing into range. While this strategy is effective, it makes them vulnerable to crowd control weapons such as the CRSPR Flamethrower due to how they like to group up when engaging a Dwarf. Their Light Armor only protects them from so much damage, and their lack of ranged capability makes them easy to space out. They are also highly vulnerable to Stuns and status effects such as Poison, Electrocution and Fear.
This creature also has Glacial Strata and Radioactive Exclusion Zone variants. The Glacial Strata variant is resistant to Ice damage and freezing, but takes extra damage from Fire. The Radioactive Exclusion Zone variant resists half of all Radiation damage. Alongside this there are two alternative forms of the Grunt - the Glyphid Grunt Slasher and the Glyphid Grunt Guard, which have their own behaviours and statistics.
Stats
The creature's damage resistance changes depending on the Hazard Level. Player count doesn't affect the resistance.
Template:Creature Health Normal
Attacks:
- Bite: Melee Damage
- Claw Swing: Melee Damage
|-
! colspan="14" class="category" style="border-top: 0px;" |
|-
! colspan="2" rowspan="3" | Damage Amount !! colspan="12" | Hazard Level
|-
! colspan="5" | Normal Mission || rowspan="2" style="border-bottom: 0px; width: 20px;" | || colspan="2" | DD || rowspan="2" style="border-bottom: 0px; width: 20px;" | || colspan="3" | EDD
|-
! style="color: #00FF00; width: 40px;" | 1
! style="color: #80FF00; width: 40px;" | 2
! style="color: #FFFF00; width: 40px;" | 3
! style="color: #FF8000; width: 40px;" | 4
! style="color: #FF0000; width: 40px;" | 5
! style="color: #FFFF00; width: 40px;" | 3
! style="color: #FFC000; width: 40px;" | 3.5
! style="color: #FF4000; width: 40px;" | 4.5
! style="color: #FF0000; width: 40px;" | 5
! style="color: #C00000; width: 40px;" | 5.5
|-
! rowspan="4" | Player Count !! ![]() | style="text-align: center;" | 0.5 || style="text-align: center;" | 0.7 || style="text-align: center;" | 1.2 || style="text-align: center;" | 2 || style="text-align: center;" | 2.8
! rowspan="4" style="border-top: 0px; |
| style="text-align: center;" | 1.2 || style="text-align: center;" | 1.5
! rowspan="4" style="border-top: 0px; |
| style="text-align: center;" | 2.3 || style="text-align: center;" | 2.8 || style="text-align: center;" | 3
|-
!
| style="text-align: center;" | 0.5 || style="text-align: center;" | 0.7 || style="text-align: center;" | 1.2 || style="text-align: center;" | 2 || style="text-align: center;" | 2.8
! rowspan="4" style="border-top: 0px; |
| style="text-align: center;" | 1.2 || style="text-align: center;" | 1.5
! rowspan="4" style="border-top: 0px; |
| style="text-align: center;" | 2.3 || style="text-align: center;" | 2.8 || style="text-align: center;" | 3
|-
! ![]() | style="text-align: center;" | 0.5 || style="text-align: center;" | 0.8
| style="text-align: center;" | 1.3 || style="text-align: center;" | 2.15 || style="text-align: center;" | 3
| style="text-align: center;" | 1.3 || style="text-align: center;" | 1.6
| style="text-align: center;" | 2.45 || style="text-align: center;" | 3 || style="text-align: center;" | 3.2
|-
!
| style="text-align: center;" | 0.5 || style="text-align: center;" | 0.8
| style="text-align: center;" | 1.3 || style="text-align: center;" | 2.15 || style="text-align: center;" | 3
| style="text-align: center;" | 1.3 || style="text-align: center;" | 1.6
| style="text-align: center;" | 2.45 || style="text-align: center;" | 3 || style="text-align: center;" | 3.2
|-
! ![]() | style="text-align: center;" | 0.5 || style="text-align: center;" | 0.9
| style="text-align: center;" | 1.4 || style="text-align: center;" | 2.3 || style="text-align: center;" | 3.2
| style="text-align: center;" | 1.4 || style="text-align: center;" | 1.7
| style="text-align: center;" | 2.6 || style="text-align: center;" | 3.2 || style="text-align: center;" | 3.4
|-
!
| style="text-align: center;" | 0.5 || style="text-align: center;" | 0.9
| style="text-align: center;" | 1.4 || style="text-align: center;" | 2.3 || style="text-align: center;" | 3.2
| style="text-align: center;" | 1.4 || style="text-align: center;" | 1.7
| style="text-align: center;" | 2.6 || style="text-align: center;" | 3.2 || style="text-align: center;" | 3.4
|-
! ![]() | style="text-align: center;" | 0.5 || style="text-align: center;" | 1
| style="text-align: center;" | 1.5 || style="text-align: center;" | 2.5 || style="text-align: center;" | 3.4
| style="text-align: center;" | 1.5 || style="text-align: center;" | 1.8
| style="text-align: center;" | 2.8 || style="text-align: center;" | 3.4 || style="text-align: center;" | 3.6
|-
| style="text-align: center;" | 0.5 || style="text-align: center;" | 1
| style="text-align: center;" | 1.5 || style="text-align: center;" | 2.5 || style="text-align: center;" | 3.4
| style="text-align: center;" | 1.5 || style="text-align: center;" | 1.8
| style="text-align: center;" | 2.8 || style="text-align: center;" | 3.4 || style="text-align: center;" | 3.6
|-
|- ! colspan="14" class="category" | Details |- ! colspan="2" style="text-align: left;" | Damage Type | colspan="12" |
|-
|-
|-
|-
|-
|-
|-
|-
|- |}
Resistance:
- Cold (Glacial Strata variant only)
Weakness:
- Fire (Glacial Strata variant only)
Weakpoint:
- Mouth (200%)
Tips
- The Glyphid Grunt is a medium-sized creature, so it will trigger the Vampire perk if killed via a melee attack.
- As mentioned before, the CRSPR Flamethrower is excellent for clearing swarms of Grunts at once. Its unlimited piercing and Sticky Flames excel at controlling hordes.
- The Heavy Autocannon's explosive bullets can saturate a battlefield and damage many Grunts at once.
- The Deepcore GK2 can quickly gun down a Grunt, and if carefully controlled, it can kill many Grunts in a single mag when firing for weakspots.
- The 40mm PGL has a large blast radius, and can be used to clear out tightly clustered groups of Glyphids with a single shell.
Gallery

Glacial Strata appearance

Radioactive Exclusion Zone appearance

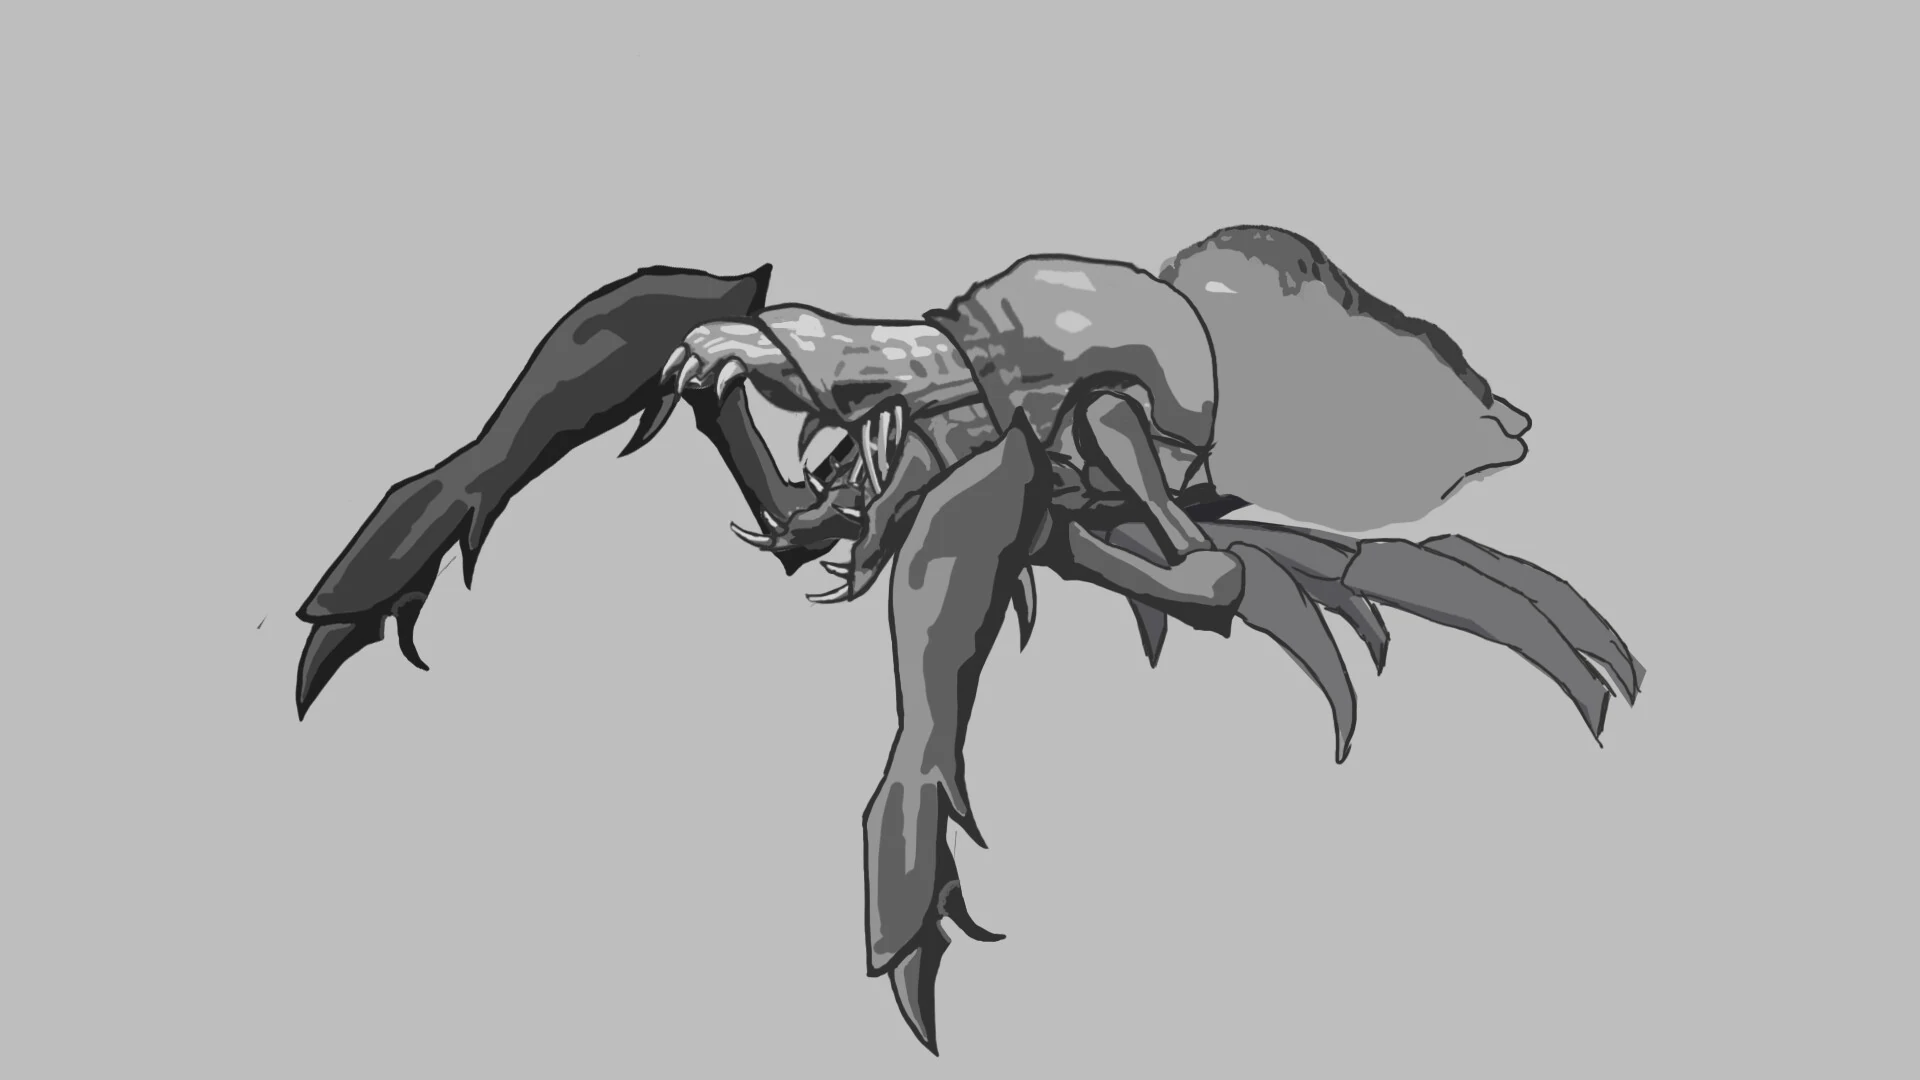
Glyphid Grunt Concept Art

| |||||||||||||||||||||||||||||||||||||