| “ | The Glyphid Dreadnought - the worst of the bunch, and arguably the worst thing Hoxxes has yet to throw at us. It's fast, smart, huge, and carries enough bio-weapons to fight a small war. It sports several preferred methods of attack, including firing actual fireballs at you, or sending cataclysmic shockwaves through the very ground you stand on. It has its abdomen exposed for heat dissipation like much of its kind, but unlike the rest this one has a tough outer shell that needs to be cracked before you can hit the weaker innards. And to make matters worse, it is capable of regenerating said shell within seconds. R&D's primary recommendation upon meeting a Dreadnought is simple: Run. |
| — Miner's Manual Description |
The Glyphid Dreadnought is a hostile boss Creature on Hoxxes. It has a 1 in 3 chance to be found inside the first Glyphid Cocoon in the Elimination gamemode, where it will attack the Dwarves once its cocoon is broken. It can also appear very rarely in place of a Swarm.
The Dreadnought is an offensive and defensive powerhouse, with dark spiky chitin covering the majority of its body and a blood-red skin tone. It has a gigantic mouth with large, razor sharp fangs. Its overall body shape is quite similar to the Glyphid Praetorian, but it has greatly increased stats. Its entire body is covered in unbreakable armor, even the parts which appear to have no armor plating. The only place it can be damaged is its abdomen, which itself starts out covered in a tough shell. To actually kill the Dreadnought, the shell around its abdomen must be broken, then it will start taking damage to its main health bar. The abdomen's shell is able to regrow back after enough time passes, or instantly if the Dreadnought takes a substantial amount of damage in a short space.
When a Dreadnought appears, its health appears as a giant bar at the top of the screen. It has a red Health bar and a yellow Shell bar. The Health bar must be emptied completely to kill a Dreadnought. The shell can regrow an infinite amount of times, but the abdomen takes double damage from all sources. That said, the Dreadnought has a staggering 4500 base amount of health, and it is impossible to kill without its shell regrowing at least twice, as the shell automatically regrows if a Dreadnought loses a third of its health at once. To back up the Dreadnought's massive health pool, it has strong resistances to common damage types such as Fire and Explosions. It is highly resistant to Freezing, and is completely immune to Electrocution and crowd control effects such as Fear, Stunning, Pheromones or the L.U.R.E. grenade.
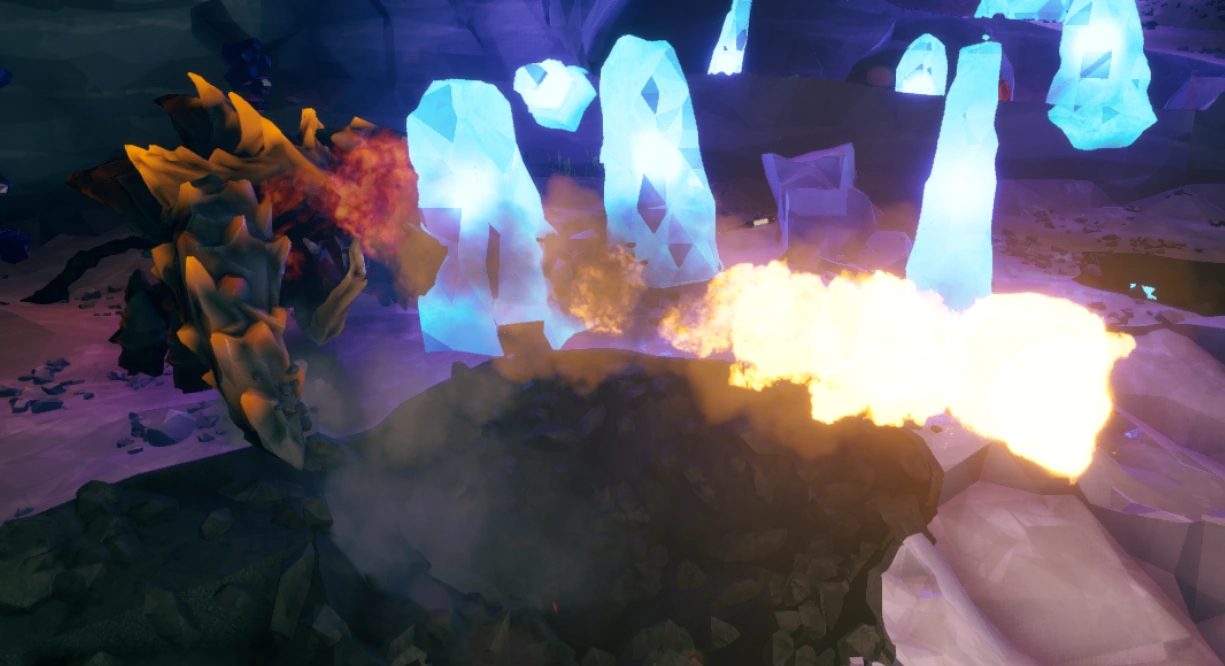
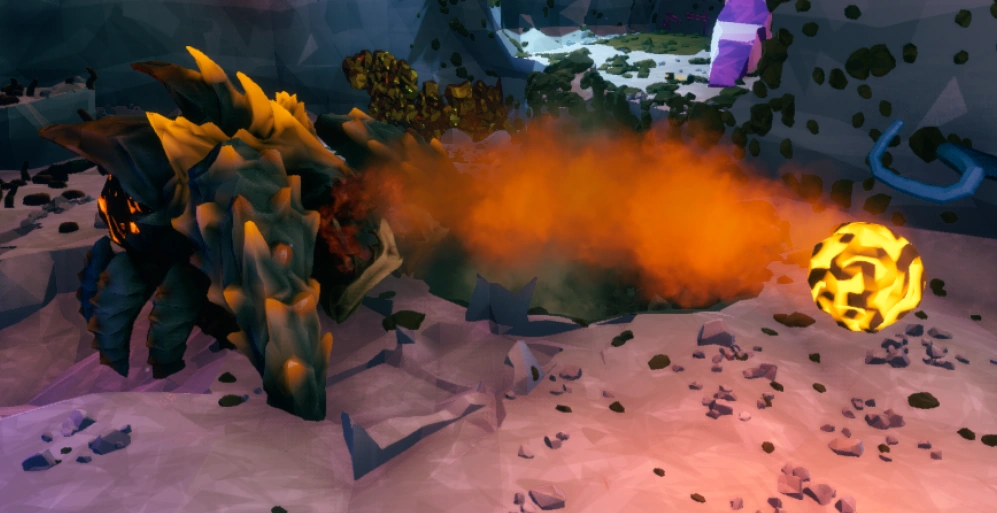
The Dreadnought also features a variety of attacks to use against the Dwarves. It uses common biting and claw swiping attacks used by other Glyphids, though with increased damage. It can also spew explosive fireballs which deal massive damage in a tight radius, and pheromone clusters which create Dreadnought-coloured Glyphid Spawn and apply the Pheromone effect to a Dwarf, making them more likely to be attacked by enemies.
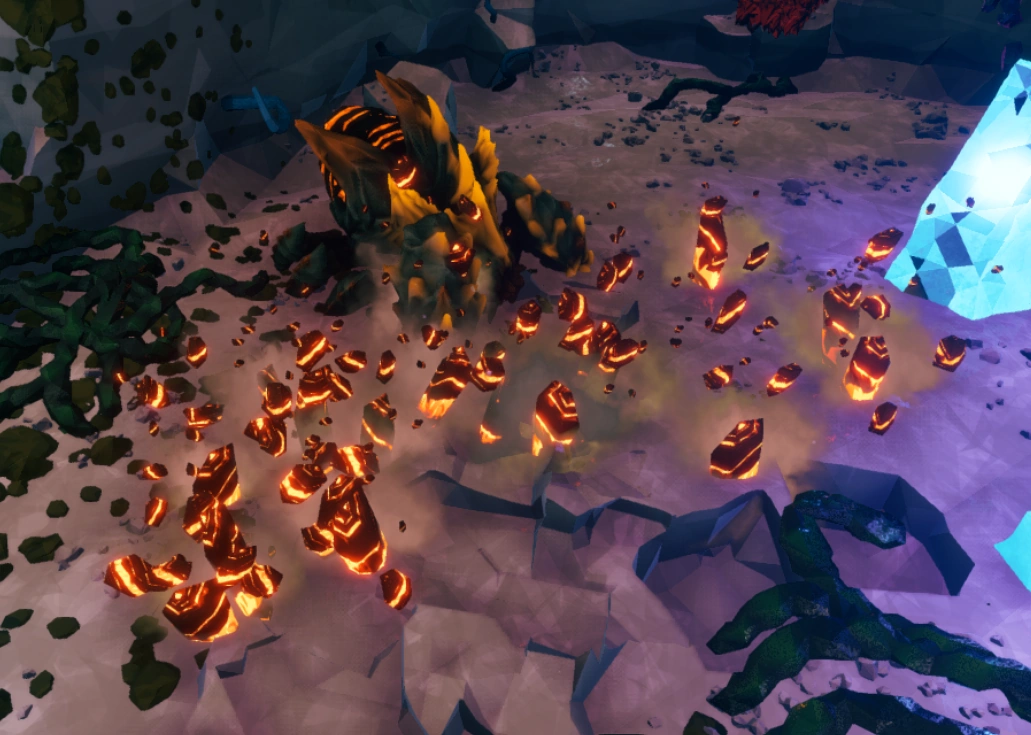
Its signature attack, the Trembling Stomp, deals extremely high damage in a wide radius around the Dreadnought itself. It prepares this attack by roaring, causing rocks to levitate, and then stomping the ground which creates volcanic spikes that impale the Dwarves. The roaring animation is supposed to provide time to get out of the way, but on higher Hazard levels this animation speeds up tremendously - as does the damage of the stomp which can instantly kill full-health dwarves on Hazard 5.
Although the Dreadnought is a fearsome foe, it does have weaknesses. It is not immune to status effects such as Neurotoxin or Radiation, making them effective choices to whittle a Dreadnought's health down. It also has a tendency to chase one Dwarf in particular while ignoring the others, which makes it vulnerable to firepower. And while it is strongly resistant to Freezing, it can still be frozen for a brief second, during which its abdomen is still highly vulnerable.
Combat
Health and Armor
| Effective
Health Scaling |
Hazard Level | |||||||||||||
|---|---|---|---|---|---|---|---|---|---|---|---|---|---|---|
| Normal Mission | DD | EDD | ||||||||||||
| 1 | 2 | 3 | 4 | 5 | 3 | 3.5 | 4.5 | 5 | 5.5 | |||||
| Player Count | 1000 | 1500 | 2500 | 3500 | 3750 | 2500 | 3000 | 3500 | 3750 | 3750 | Health | |||
| 2000 | 2000 | 2750 | 3750 | 4000 | 2750 | 3250 | 3750 | 4000 | 4000 | |||||
| 3000 | 3500 | 4500 | 5000 | 6000 | 4500 | 4750 | 5500 | 6000 | 6000 | |||||
| 4000 | 5000 | 6000 | 8000 | 8500 | 6000 | 7000 | 8000 | 8000 | 8500 | |||||
| Player Count | 340 | 510 | 850 | 1190 | 1190 | 850 | 1020 | 1190 | 1190 | 1190 | Shell | |||
| 680 | 680 | 935 | 1275 | 1360 | 935 | 1020 | 1190 | 1360 | 1190 | |||||
| 1020 | 1190 | 1530 | 1700 | 2040 | 1530 | 1700 | 1870 | 2040 | 1870 | |||||
| 1360 | 1700 | 2040 | 2720 | 2890 | 2040 | 2380 | 2720 | 2890 | 2720 | |||||
Attacks
| Direct Melee Attack | |||||||||||||
|---|---|---|---|---|---|---|---|---|---|---|---|---|---|
| Damage Amount | Hazard Level | ||||||||||||
| Normal Mission | DD | EDD | |||||||||||
| 1 | 2 | 3 | 4 | 5 | 3 | 3.5 | 4.5 | 5 | 5.5 | ||||
| Player Count | 12.5 | 17.5 | 30 | 50 | 70 | 30 | 37.5 | 57.5 | 70 | 75 | |||
| 12.5 | 20 | 32.5 | 53.75 | 75 | 32.5 | 40 | 61.25 | 75 | 80 | ||||
| 12.5 | 22.5 | 35 | 57.5 | 80 | 35 | 42.5 | 65 | 80 | 85 | ||||
| 12.5 | 25 | 37.5 | 62.5 | 85 | 37.5 | 45 | 70 | 85 | 90 | ||||
| Details | |||||||||||||
| Damage Type | Melee | ||||||||||||
| Max. Angle | 180° | ||||||||||||
| AoE Attack | |||||||||||||
|---|---|---|---|---|---|---|---|---|---|---|---|---|---|
| Area Damage | Hazard Level | ||||||||||||
| Normal Mission | DD | EDD | |||||||||||
| 1 | 2 | 3 | 4 | 5 | 3 | 3.5 | 4.5 | 5 | 5.5 | ||||
| Player Count | 42.5 | 59.5 | 102 | 170 | 238 | 102 | 127.5 | 195.5 | 238 | 255 | |||
| 42.5 | 68 | 110.5 | 182.75 | 255 | 110.5 | 136 | 208.25 | 255 | 272 | ||||
| 42.5 | 76.5 | 119 | 195.5 | 272 | 119 | 144.5 | 221 | 272 | 289 | ||||
| 42.5 | 85 | 127.5 | 212.5 | 289 | 127.5 | 153 | 238 | 289 | 306 | ||||
| Details | |||||||||||||
| Damage Type | Explosive | Radius: 6.75 m | |||||||||||
| AoE Projectile | |||||||||||||
|---|---|---|---|---|---|---|---|---|---|---|---|---|---|
| Area Damage | Hazard Level | ||||||||||||
| Normal Mission | DD | EDD | |||||||||||
| 1 | 2 | 3 | 4 | 5 | 3 | 3.5 | 4.5 | 5 | 5.5 | ||||
| Player Count | 15 | 21 | 36 | 60 | 84 | 36 | 45 | 69 | 84 | 90 | |||
| 15 | 24 | 39 | 64.5 | 90 | 39 | 48 | 73.5 | 90 | 96 | ||||
| 15 | 27 | 42 | 69 | 96 | 42 | 51 | 78 | 96 | 102 | ||||
| 15 | 30 | 45 | 75 | 102 | 45 | 54 | 84 | 102 | 108 | ||||
| Details | |||||||||||||
| Damage Type | Explosive | Radius: 2.75 m | |||||||||||
| Projectile | |||||||||||||
|---|---|---|---|---|---|---|---|---|---|---|---|---|---|
| Damage Amount | Hazard Level | ||||||||||||
| Normal Mission | DD | EDD | |||||||||||
| 1 | 2 | 3 | 4 | 5 | 3 | 3.5 | 4.5 | 5 | 5.5 | ||||
| Player Count | 0.05 | 0.07 | 0.12 | 0.2 | 0.28 | 0.12 | 0.15 | 0.23 | 0.28 | 0.3 | |||
| 0.05 | 0.08 | 0.13 | 0.215 | 0.3 | 0.13 | 0.16 | 0.245 | 0.3 | 0.32 | ||||
| 0.05 | 0.09 | 0.14 | 0.23 | 0.32 | 0.14 | 0.17 | 0.26 | 0.32 | 0.34 | ||||
| 0.05 | 0.1 | 0.15 | 0.25 | 0.34 | 0.15 | 0.18 | 0.28 | 0.34 | 0.36 | ||||
| Details | |||||||||||||
| Damage Type | Typeless | ||||||||||||
| AoE Projectile | |||||||||||||
| Area Damage | Hazard Level | ||||||||||||
| Normal Mission | DD | EDD | |||||||||||
| 1 | 2 | 3 | 4 | 5 | 3 | 3.5 | 4.5 | 5 | 5.5 | ||||
| Player Count | 0 | 0 | 0 | 0 | 0 | 0 | 0 | 0 | 0 | 0 | |||
| 0 | 0 | 0 | 0 | 0 | 0 | 0 | 0 | 0 | 0 | ||||
| 0 | 0 | 0 | 0 | 0 | 0 | 0 | 0 | 0 | 0 | ||||
| 0 | 0 | 0 | 0 | 0 | 0 | 0 | 0 | 0 | 0 | ||||
| Details | |||||||||||||
| Damage Type | Typeless | Radius: 3 m | |||||||||||
| Duration | 10 s | ||||||||||||
| Status Effect | Pheromones for 10 s | ||||||||||||
| Carving Attack | |||||||||||||
|---|---|---|---|---|---|---|---|---|---|---|---|---|---|
| Area Damage | Hazard Level | ||||||||||||
| Normal Mission | DD | EDD | |||||||||||
| 1 | 2 | 3 | 4 | 5 | 3 | 3.5 | 4.5 | 5 | 5.5 | ||||
| Player Count | 7.5 | 10.5 | 18 | 30 | 42 | 18 | 22.5 | 34.5 | 42 | 45 | |||
| 7.5 | 12 | 19.5 | 32.25 | 45 | 19.5 | 24 | 36.75 | 45 | 48 | ||||
| 7.5 | 13.5 | 21 | 34.5 | 48 | 21 | 25.5 | 39 | 48 | 51 | ||||
| 7.5 | 15 | 22.5 | 37.5 | 51 | 22.5 | 27 | 42 | 51 | 54 | ||||
| Details | |||||||||||||
| Damage Type | Melee | Attack Radius: 5 m | |||||||||||
| Max. Angle | 180° | ||||||||||||
| Carve Radius | 2.5 m | ||||||||||||
Tips
- Weakspot damage bonus modifications will increase damage to the abdomen but not the shell. Armor breaking will not increase damage to the shell nor will it pierce the Dreadnought's unbreakable armor.
- Gunners:
- The Powered Minigun is an excellent Dreadnought killer, effective on both the shell and the abdomen. Its extremely high DPS and accuracy can melt through a Dreadnought's armor.
- The Autocannon is less effective against Dreadnoughts due to its inaccuracy, lower DPS, and Dreadnought's resistance to explosive damage during its health phases. Mods that focus on direct damage can help to mitigate these downsides.
- Both of the Gunner's sidearms have access to Hollow Point Bullets with particularly high bonus damage, making them very effective during the Deadnought's health phases.
- Hanging from a Zipline while firing down upon the Dreadnought is an effective way to stay safe while avoiding its damage, but be aware it can knock you off the Zipline with its fireball attack.
- The Shield Generator is capable of forcing Dreadnoughts out of its radius, which is useful when trying to revive teammates. However, keep in mind that the Dreadnought can use its Trembling Stomp attack to damage dwarves through the barrier.
- Scouts:
- The M1000 Classic's focus shots deal significant damage to a Dreadnought's abdomen, especially with weakspot damage bonus modifications. The Jury-Rigged Boomstick can also deal excellent damage to the abdomen.
- Dreadnoughts are immune to the effects of Pheromone Canisters and thaw from Cryo Grenades quickly, so IFGs are the most useful grenade to bring. But note that Dreadnoughts are immune to electrocution, so the NUK17 + IFG synergy with Conductive Bullets mod won't work.
- The Grappling Hook and mods like Special Powder help Scouts avoid damage or get behind the Dreadnought to damage its shell. And they allow the Scout to be an excellent decoy to distract the Dreadnought while other classes fire at it.
- Remember to keep the area illuminated with the Flare Gun.
- Engineers:
- The Auto 210 deals effective damage to the abdomen. The Voltaic SMG is less effective against Dreadnoughts due to their resistance to electrical damage (during their health phases) and immunity to electrocution, but mods that focus on kinetic damage can help to mitigate this.
- The Breach Cutter can cut through the Dreadnought's body and damage its abdomen from the front, but many plasma blades are needed to deal serious damage. Especially during the health phase, as the Breach Cutter does not deal bonus damage to weak points.
- Similarly, the Grenade Launcher should not be used during a Dreadnought's health phase.
- Dreadnought are not affected by L.U.R.E.s, so bring Plasma Bursters or Proximity Mines. Multiple of the latter can be thrown in one spot to set a trap that will deal substantial damage.
- Sentry Guns are tricky to use against Dreadnoughts as they don't target the abdomen specifically, wasting ammo. Instead, save your turrets for in-between segments while finding Cocoons, or use the Defender System and face your turret(s) away from the Dreadnought to thin out other enemies that may spawn during the fight.
- Drillers:
- Sidearms and Impact Axes are the safest ways to contribute damage, as getting close to use either of the primaries risks friendly fire, and Drillers aren't able to escape from danger as easily as Scouts and Gunners. The Subata in particular has very high bonus damage with Hollow Point Bullets, making it quite effective during the Dreadnought's health phases.
- Both the Flamethrower and Cryo Cannon can damage a Dreadnought through its frontal armor. It is resistant to both ignited and frozen status effects, so consider equipping damage-focused mods instead. Neither primary can deal weak spot damage, so their damage output feels particularly lackluster during the Dreadnought's health phases.
- Drillers can plant a Satchel Charge at the cocoon and detonate it immediately after the Dreadnought spawns to start the fight with some free damage. Keep in mind Dreadnoughts are resistant to explosive damage during their health phases, so Satchel Charges are best used to break the regenerating armor.
- The Sticky Flame Slowdown is a reliable method of slowing down the Dreadnought, and can be invaluable for keeping you and your teammates alive.
- Digging a grid shaped arena can allow chased team mates to easily hide behind cover and make the Dreadnought an easy target while he slowly digs through walls.
Gallery

Ignited Projectile
Swarm Bladder
Trembling Stomp
Trivia
- Glyphid Dreadnoughts are implied to be able to "turn into something even worse" if left to pupate for too long, according to Mission Control. It is currently unknown what it would become in such a case.
- There used to be a glitch in which the Dreadnought would rotate during stationary phases, such as during a roar, when players tried to get behind it, covering its weakspot. This was later patched in Update 33: New Frontiers.
| |||||||||||||||||||||||||||||||||||||