Thecyrobot (talk | contribs) (Corrected payout details) |
No edit summary |
||
| (22 intermediate revisions by 12 users not shown) | |||
| Line 1: | Line 1: | ||
| + | {{Updated|U33}} |
||
{{mission infobox |
{{mission infobox |
||
| name = Elimination |
| name = Elimination |
||
| Line 4: | Line 5: | ||
| type = Non-linear |
| type = Non-linear |
||
| deposit = [[M.U.L.E]] |
| deposit = [[M.U.L.E]] |
||
| − | | objective = Kill 2-3 [[ |
+ | | objective = Kill 2-3 [[Dreadnought Types|Dreadnoughts]] |
| − | | payout = |
+ | | payout = 570-840 |
| + | | xppayout = 2000 |
||
}} |
}} |
||
| − | [[{{PAGENAME}}]] is a mission type in ''{{Gamename}}''. |
+ | [[{{PAGENAME}}]] is a mission type in ''{{Gamename}}''. |
| ⚫ | |||
| − | The goal in Elimination missions is to locate and destroy multiple [[Glyphid Dreadnought]]s, which are sleeping in their cocoons when the dwarves arrive. The [[Drop Pod]] is landed in a small "starter" room typically lined with resources such as Gold and Nitra. There are usually at least four tunnels to various caverns blocked by Compacted Dirt. These can be taken in any order to get to the Cocoons, though use of the player's Terrain Scanner will aid in locating them. They appear on the scanner as bright red egg shapes. The Cocoons themselves tend to spawn in open areas to fight in and are surrounded by veins of blue organic material, and emit an audible heartbeat sound. They are safe to approach, but take very little damage to break. |
||
| + | A nest of large Glyphid Cocoons has been located underground and the [[Dwarves]] are ordered to eliminate their various inhabitants: ferocious and heavily armored [[Dreadnought Types|Dreadnoughts]]. Eliminations are the fourth and final unlockable mission type, the third being Point Extraction. |
||
| ⚫ | |||
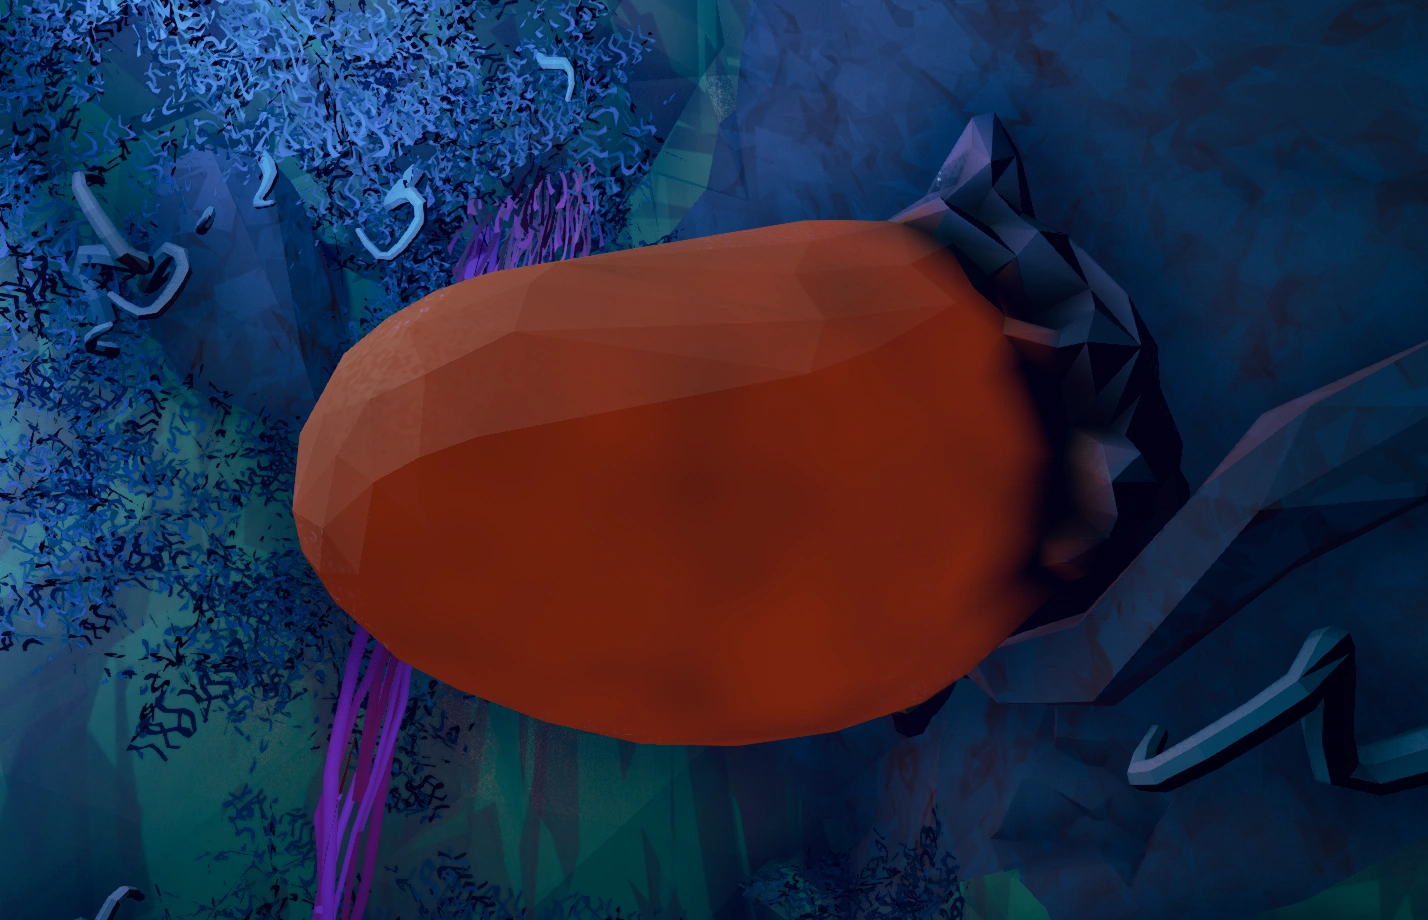
| + | [[File:Dreadnought cocoon.png|300px|right|thumb|none|The Dreadnought Cocoon]] |
||
| ⚫ | |||
| − | {{main|Glyphid Dreadnought}} |
||
| + | == Eliminate Dreadnought Types == |
||
| ⚫ | |||
| + | The goal in Elimination missions is to locate and destroy multiple [[Dreadnought Types|Dreadnoughts]], which are in their cocoons when the Dwarves arrive. Any Dreadnought variant can spawn from a cocoon, but the same variant can not spawn from two consecutive cocoons. |
||
| + | The cocoons appear on the scanner as bright red egg shapes. The cocoons themselves spawn near open areas to fight in and are surrounded by veins of blue organic material. They emit an audible heartbeat sound and are safe to approach, but take very little damage to break. |
||
| − | *'''Bite''' |
||
| − | ** If a player is close enough to the dreadnought, it will bite, dealing 17 damage. |
||
| − | *'''Charge''' |
||
| − | ** The Dreadnought will charge towards its target with increased speed to close the gap between them. |
||
| − | *'''Fireball''' |
||
| − | ** The Dreadnought spits an explosive fireball from its mouth, which flies in a straight line and destroys the terrain it impacts. Deals 28 damage on impact. |
||
| − | *'''Swarmer Egg''' |
||
| − | ** Instead of a fireball, the Dreadnought can spit an arcing egg which releases multiple [[Glyphid Swarmer]]s when it impacts a surface. If the egg hits a dwarf, it will cover them in pheromones and turn them into a target for the newly spawned Swarmers. |
||
| − | *'''Spike Field''' |
||
| − | ** If players surround the Dreadnought, it will roar ferociously before stamping the ground, summoning a dangerous field of magma spikes. Any dwarves close to the Dreadnought when the attack hits will take a huge 60 points of damage. |
||
| − | *'''Dig''' |
||
| − | ** If the players are hiding in a location that the Dreadnought cannot reach them in, it will destroy the terrain using its front legs to reach them. |
||
| ⚫ | Swarms do not attack the players in Elimination missions, but smaller waves of enemies will occasionally attack, including while a [[Dreadnought Types|Dreadnought Type]] is being fought. Since these missions are more combat focused, higher quantities of Nitra can be found on the walls to aid in calling Resupply Drops. |
||
| − | The Dreadnought is currently the only monster in the game to boast a unique health bar. Once summoned its HP will be visible at all times at the top of the screen to all players. The Dreadnought has two health bars; one standard HP bar and a second "armor" bar. The Glyphid Dreadnought has impenetrable armor plates which cannot be shot though with firepower, and its only weakpoint is its rear (similar to Praetorians). The rear is protected by a destructible shell, tied to the armor bar, which will reveal its weakpoint when destroyed. The shell will regenerate after a brief period of being destroyed, and must be broken again before the dwarves can attack the weakpoint. The shell can regenerate faster on higher difficulties. While the shell is broken players can also shoot the Dreadnought's mouth, though this deals limited damage. After all of the Glyphid Cocoons and Dreadnoughts have been destroyed, the extraction phase can be started using a red button on the [[M.U.L.E.]]. |
||
| + | While you must complete your primary objective to finish the mission, You can choose to collect an optional [[Resources#Secondary_Objectives|secondary objective resource]] for a {{credits}} Credit and {{Xp}} Experience bonus upon mission completion. |
||
| − | === Dreadnought elimination strategies === |
||
| + | After the primary objective is completed, a red button will light up on the M.U.L.E to begin the extraction phase. Once pressed the Drop Pod will be called in to pick up the M.U.L.E and any surviving miners. It will wait for 5 minutes before departing, though the door will only open once the MULE has been secured. |
||
| − | * Prepare your arena before starting for as much advantage as possible. |
||
| + | |||
| − | ** Scouts should illuminate the area with their flare guns. |
||
| ⚫ | |||
| − | ** Engineers can set up sentries and place platforms on unsecure terrain. |
||
| + | Elimination caves consist of a small "starter" room typically lined with resources such as Gold and Nitra. There are usually a few tunnels to various caverns blocked by Compacted Dirt. These can be taken in any order to get to the Cocoons, though use of the player's Terrain Scanner will aid in locating them. |
||
| − | ** Drillers can dig out extra space and place their explosives on top of the Cocoon to detonate as soon as the Dreadnought emerges. |
||
| + | |||
| − | ** Gunners should fire Ziplines in useful locations to fire down upon the Dreadnought with. |
||
| ⚫ | |||
| − | * Dreadnoughts tend to focus down one player at a time and will only use their special moves such as the Fireball and Spike Field if they believe they can strike multiple targets. |
||
| + | {{main|Dreadnought Types}} |
||
| − | * Dreadnoughts resist Fire, Explosive and Electrical damage by %50. Try to avoid using these weapons if possible. |
||
| + | |||
| − | * Most Grenades which impede enemy movement such as the Scout's Cryo Grenades and IFGs are not effective against Dreadnoughts. |
||
| ⚫ | |||
| − | * Shield Generators won't stop a Dreadnought from running inside, but they are still valued for their boosts to damage resistence and shield regenerators. |
||
| + | |||
| − | * Weapons with Armor Penetration upgrades '''do not''' deal extra damage to the Dreadnought's shell. |
||
| + | {| mode="no-lines" |
||
| + | | <big> '''[[Glyphid Dreadnought]]''' </big> |
||
| + | | <big> '''[[Dreadnought Hiveguard]]''' </big> |
||
| + | | <big> '''[[Glyphid Dreadnought Twins]]''' </big> |
||
| + | |- |
||
| + | | [[File:Glyphid dreadnought.png|350px]] |
||
| + | | [[File:Dreadnought Hiveguard.png|350px]] |
||
| + | | [[File:Dreadnought Twins.png|350px]] |
||
| + | |} |
||
| + | |||
| + | == Objectives == |
||
=== Primary Objective === |
=== Primary Objective === |
||
The number of targets to kill is based on the length and complexity of the mission. |
The number of targets to kill is based on the length and complexity of the mission. |
||
| − | The payout is affected by [[Hazard Bonus]]. |
||
{|class="wikitable" style="text-align:center" |
{|class="wikitable" style="text-align:center" |
||
| Line 61: | Line 60: | ||
|{{icon cave|complexity|2}} |
|{{icon cave|complexity|2}} |
||
|Kill 2 Targets |
|Kill 2 Targets |
||
| − | |{{credits}} |
+ | |{{credits}} 570 |
| − | |{{credits}} |
+ | |{{credits}} 180/{{tooltip|300|Hollomite payout}} |
| + | |- |
||
| + | |{{icon cave|length|3}} |
||
| + | |{{icon cave|complexity|3}} |
||
| + | |Kill 3 Targets |
||
| + | |{{credits}} 840 {{Xp}} 2800 |
||
| + | |{{credits}} 280/{{tooltip|350|Hollomite payout}} {{Xp}} 1260/{{tooltip|1120|Hollomite xp}} |
||
| + | |- |
||
| + | ! colspan="5" |Base Values (complexity/length bonus deducted) |
||
|- |
|- |
||
|{{icon cave|length|3}} |
|{{icon cave|length|3}} |
||
| Line 68: | Line 75: | ||
|Kill 3 Targets |
|Kill 3 Targets |
||
|{{credits}} 600 {{Xp}} 2000 |
|{{credits}} 600 {{Xp}} 2000 |
||
| − | |{{credits}} 200/{{tooltip|250|Hollomite payout}} {{Xp}} 900/{{tooltip|800|Hollomite |
+ | |{{credits}} 200/{{tooltip|250|Hollomite payout}} {{Xp}} 900/{{tooltip|800|Hollomite xp}} |
|} |
|} |
||
=== Secondary Objective === |
=== Secondary Objective === |
||
| + | {| |
||
| − | Possible Secondary Objectives: |
||
| + | |- style="vertical-align: top;" |
||
| + | | width=220px | |
||
| + | {{icon resource|Fossil|34px}} Collect '''10 [[Alien Fossil]]''' |
||
| − | {{icon resource| |
+ | {{icon resource|Apoca bloom|34px}} Collect '''15 [[Apoca Bloom]]''' |
| − | {{icon resource| |
+ | {{icon resource|Boolo cap|34px}} Collect '''20 [[Boolo Cap]]''' |
| − | {{icon resource| |
+ | {{icon resource|Ebonut|34px}} Collect '''14 [[Ebonut]]''' |
| + | | |
||
| + | {{icon resource|Fleas|34px}} Exterminate '''10 [[Fester Flea]]s''' |
||
| − | {{icon resource| |
+ | {{icon resource|Gunk Seed|34px}} Collect '''12 [[Gunk Seed]]''' |
| + | {{icon resource|Hollomite|34px}} Collect '''25 [[Hollomite]]''' |
||
| ⚫ | |||
| + | |} |
||
| ⚫ | |||
| ⚫ | |||
| ⚫ | |||
| + | * Two new Dreadnought variants were added in [[Update 33: New Frontiers]]: the [[Dreadnought Hiveguard]] and [[Glyphid Dreadnought Twins]]. |
||
| + | |||
| + | <br/> |
||
{{Mission nav}} |
{{Mission nav}} |
||
| + | |||
| + | [[es:Eliminación]] |
||
Revision as of 22:37, 12 May 2021
| Elimination | |
|---|---|
| Mission Details | |
| Cave Type | Non-linear |
| Deposit Type | M.U.L.E |
| Objective(s) | Kill 2-3 Dreadnoughts |
| Payout | |
| XP Payout | |
Elimination is a mission type in Deep Rock Galactic.
A nest of large Glyphid Cocoons has been located underground and the Dwarves are ordered to eliminate their various inhabitants: ferocious and heavily armored Dreadnoughts. Eliminations are the fourth and final unlockable mission type, the third being Point Extraction.

The Dreadnought Cocoon
Eliminate Dreadnought Types
The goal in Elimination missions is to locate and destroy multiple Dreadnoughts, which are in their cocoons when the Dwarves arrive. Any Dreadnought variant can spawn from a cocoon, but the same variant can not spawn from two consecutive cocoons.
The cocoons appear on the scanner as bright red egg shapes. The cocoons themselves spawn near open areas to fight in and are surrounded by veins of blue organic material. They emit an audible heartbeat sound and are safe to approach, but take very little damage to break.
Swarms do not attack the players in Elimination missions, but smaller waves of enemies will occasionally attack, including while a Dreadnought Type is being fought. Since these missions are more combat focused, higher quantities of Nitra can be found on the walls to aid in calling Resupply Drops.
While you must complete your primary objective to finish the mission, You can choose to collect an optional secondary objective resource for a ![]() Credit and
Credit and ![]() Experience bonus upon mission completion.
Experience bonus upon mission completion.
After the primary objective is completed, a red button will light up on the M.U.L.E to begin the extraction phase. Once pressed the Drop Pod will be called in to pick up the M.U.L.E and any surviving miners. It will wait for 5 minutes before departing, though the door will only open once the MULE has been secured.
Cave
Elimination caves consist of a small "starter" room typically lined with resources such as Gold and Nitra. There are usually a few tunnels to various caverns blocked by Compacted Dirt. These can be taken in any order to get to the Cocoons, though use of the player's Terrain Scanner will aid in locating them.
Dreadnoughts
- Main article: Dreadnought Types
Once a Glyphid Cocoon has been shattered, any of the three types of Glyphid Dreadnoughts will appear. They will attack immediately, using a variety of attacks to incapacitate the Dwarves. These attacks vary for each Dreadnought type.
| Glyphid Dreadnought | Dreadnought Hiveguard | Glyphid Dreadnought Twins |
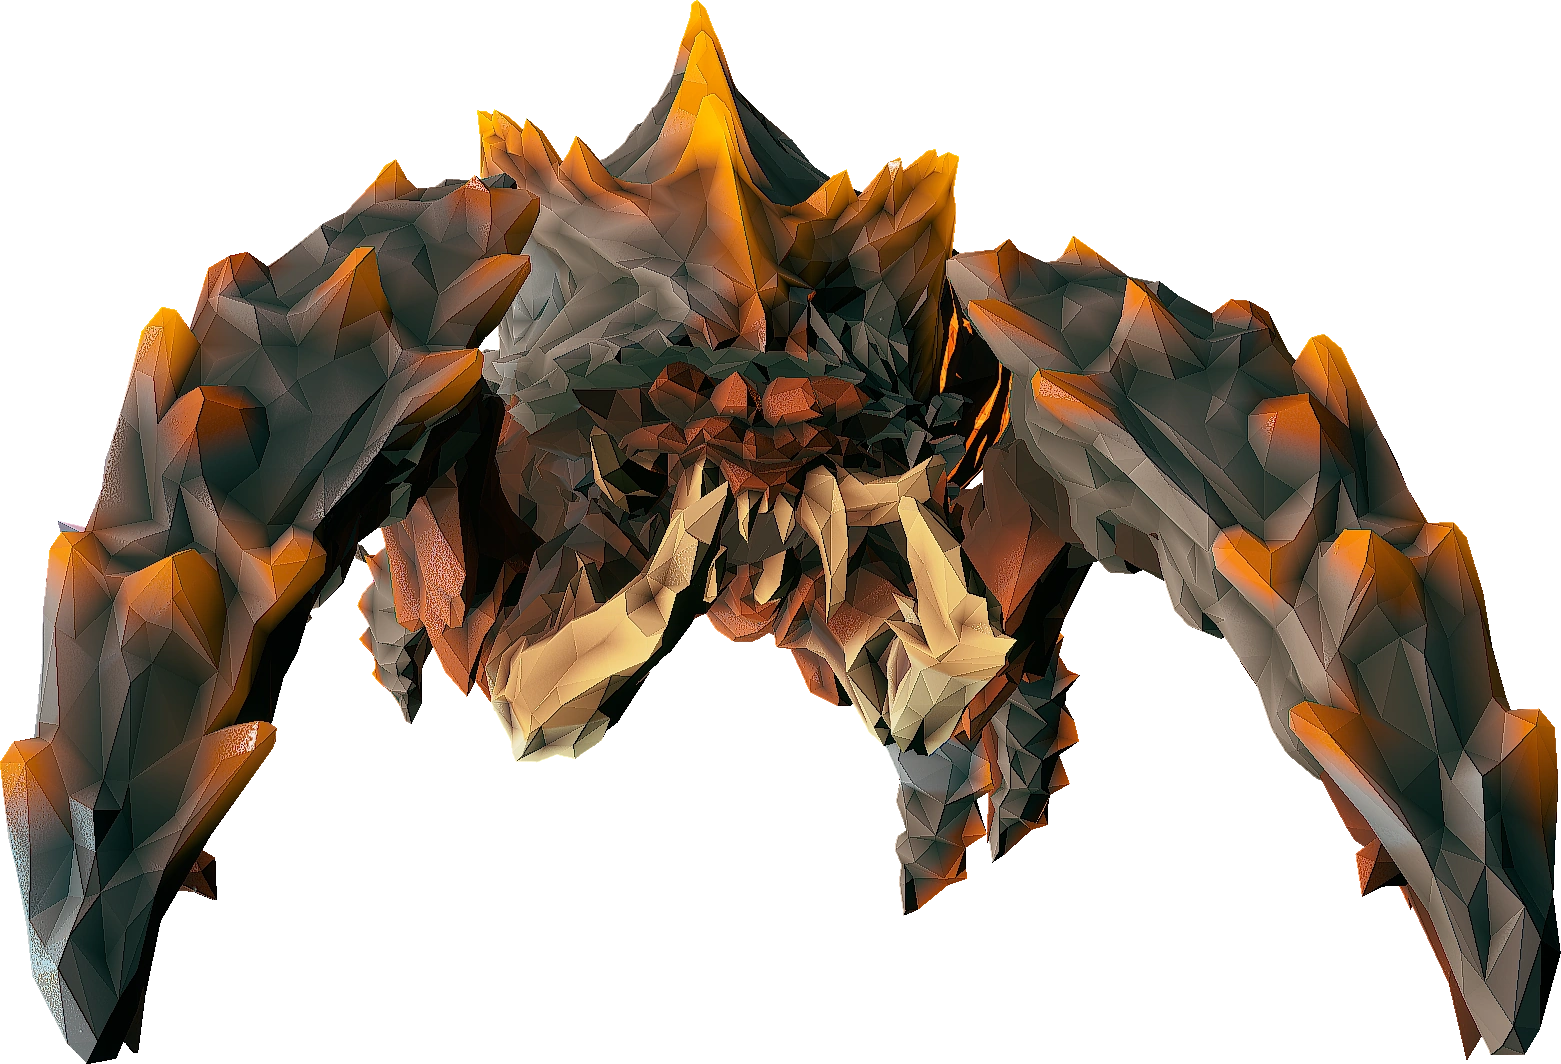
|
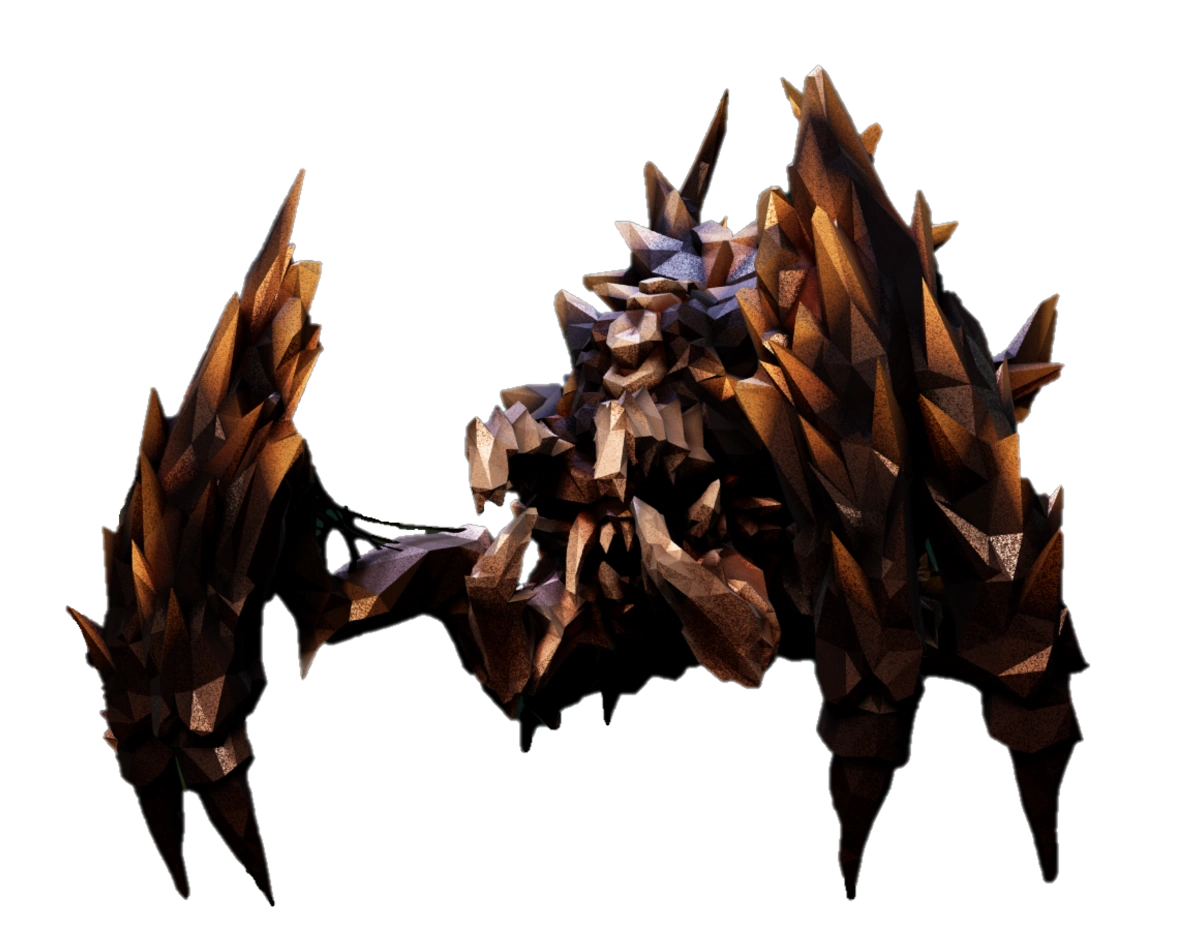
|
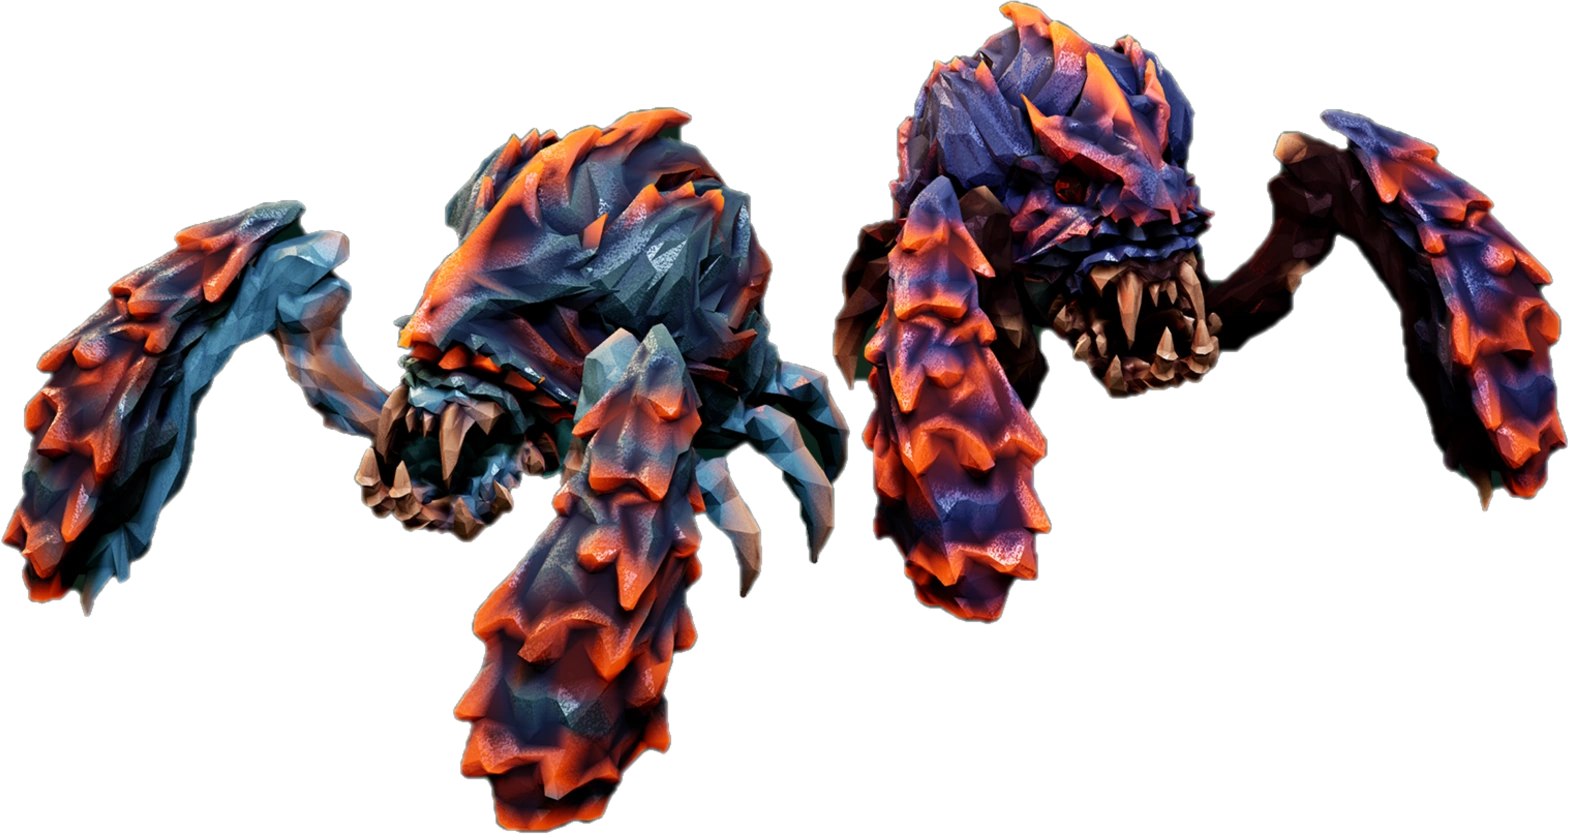
|
Objectives
Primary Objective
The number of targets to kill is based on the length and complexity of the mission.
| Length | Complexity | Objective | Primary Payout | Secondary Payout |
|---|---|---|---|---|
| Kill 2 Targets | ||||
| Kill 3 Targets | ||||
| Base Values (complexity/length bonus deducted) | ||||
| Kill 3 Targets | ||||
Secondary Objective
|
|
|
Trivia
- Glyphid Dreadnoughts first appeared in Update 5.
- Two new Dreadnought variants were added in Update 33: New Frontiers: the Dreadnought Hiveguard and Glyphid Dreadnought Twins.
| ||||||||